Konu özeti
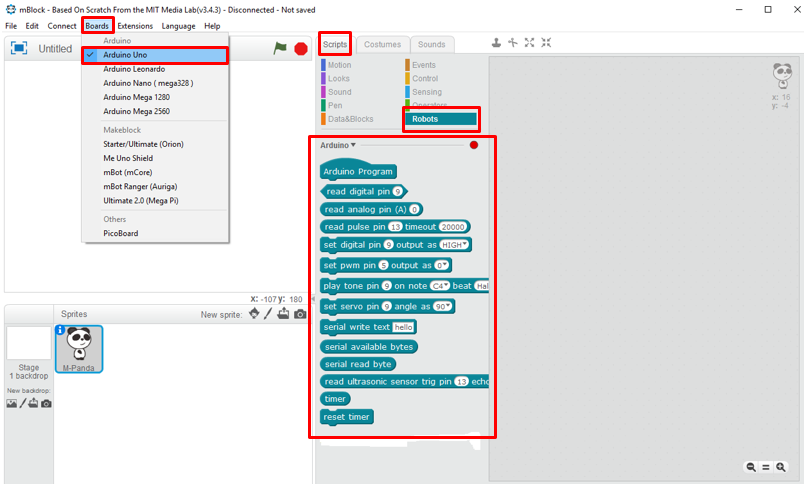
2. Select your shield in mBlock
- For do this, you go to Boards and select the board that you want to paired
- A new drop-down menu, called Arduino in this case, will appear in the section of Scripts => Robots.
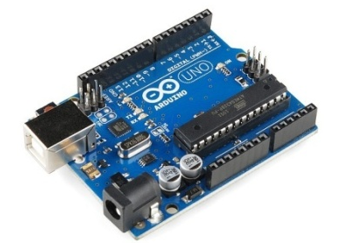
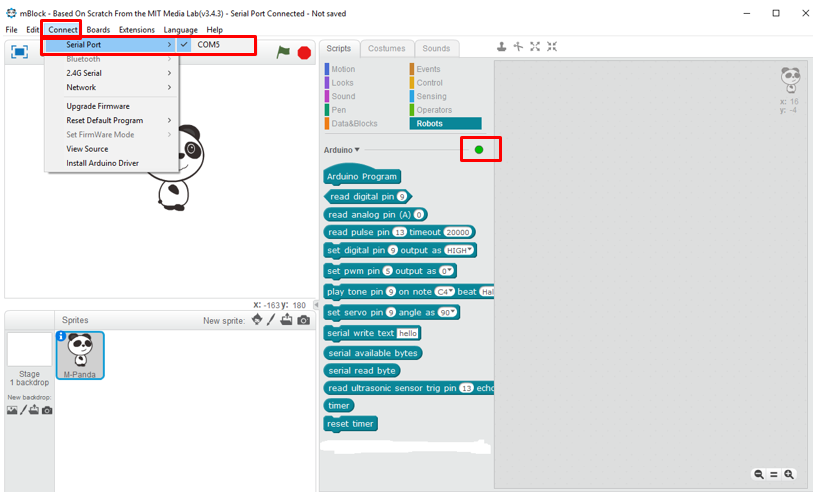
3. Connect the Arduino Shield
- Connect the board to the computer and connect it to the program.
- You go to Connect => Serial Port => select your COM
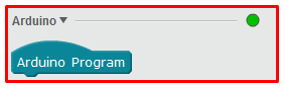
- If the board has been connected correctly, a green icon will appear in the Arduino drop-down menu.
4. Libraries for Arduino components
- If for our project we need to connect components to the Arduino board, we will need to download the necessary libraries to be able to program them in mBlock software.
- For do this, you go to Extensions => Manage Extensions => select your Arduino component.
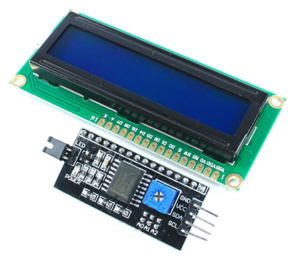
- In this case, we use the LCD with I2C interface.
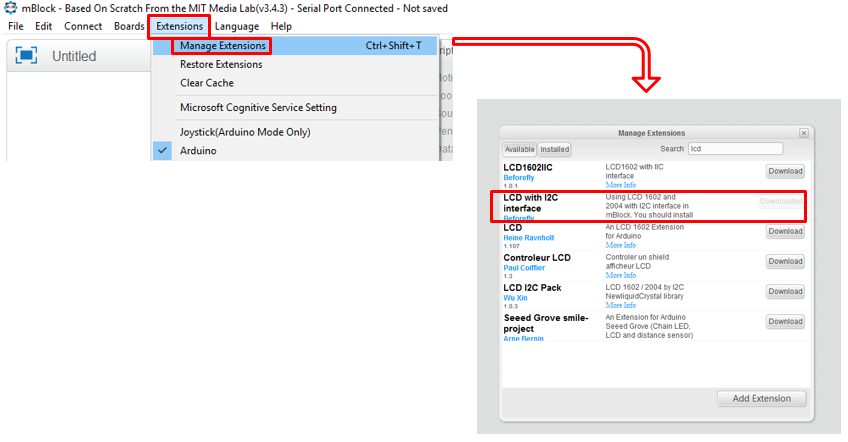
- Once we have selected the library that we need, it will appear in the Robots section.
- If the library you need is not inside to mBlock, you can download it from a website and import it.

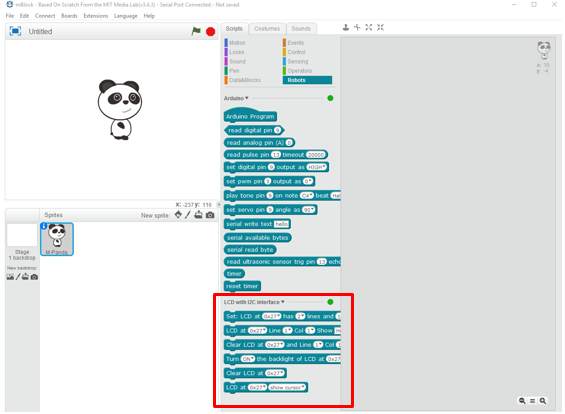
5. Programming our project
- Once we have imported all the necessary libraries to carry out our project, we proceed to the programming with Scratch.
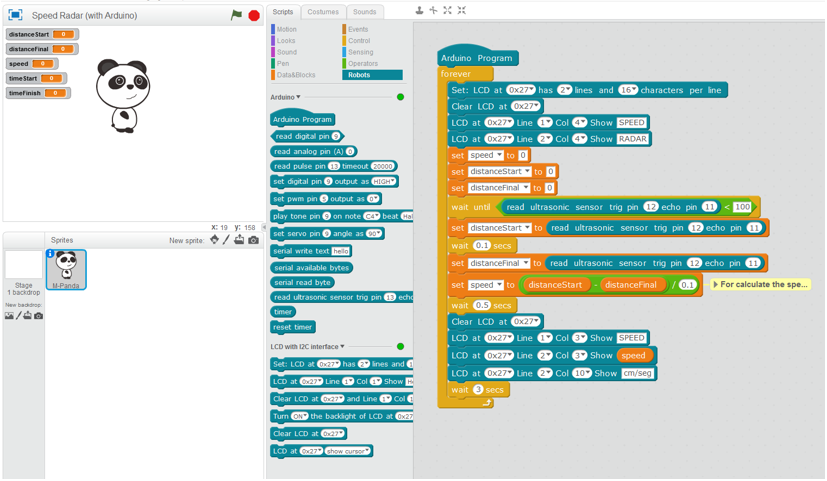
- IMPORTANT, as we are using an Arduino shield, the program will be start with:
- Next, we show an example of programming with the LCD screen and the ultrasound sensor.
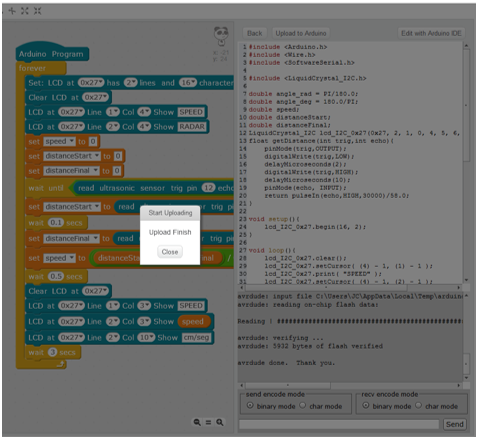
6. Upload to Arduino
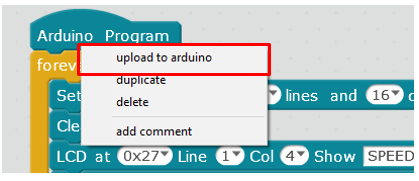
- In Arduino Program block, with the right button of mouse, we click in "Upload to Arduino”.
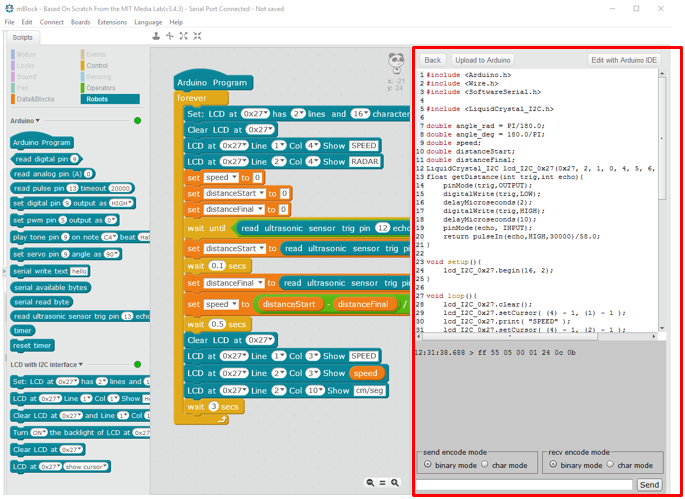
- A new section open it.
- It will apears our program in Arduino Code.
- If we want to open the "Arduino IDE”, software where we can program the Arduino code, we push the "Edit with Arduino IDE” button.
- Arduino IDE software:

- We click in "Upload to Arduino” and our program starts to upload to Arduino shield:

- If everything went well, our program will be loaded successfully:
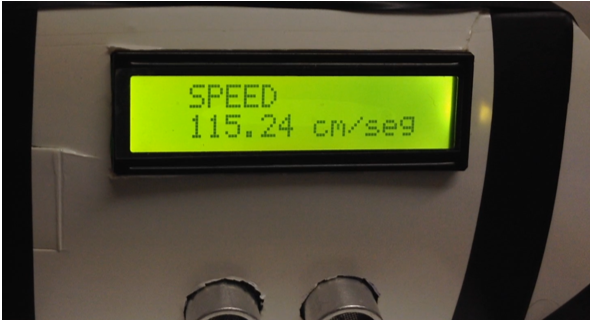
- This is the result of our project: